Another Christmas season has been wrapped up and with it several handmade gifts were given and received. A handmade Christmas is traditional in our family. Gifts always seem to carry some family history or significance.
For my kids:
This quilt was made from a vintage quilt top bought at an estate sale. I think, because of the pink fabric, it was done in the 1930s. The scraps used are from clothing. I gave this to my son, it's about a queen size quilt.
I made this Christmas quilt using precut Moda squares from the Winter's Song line. It's a small 'Round the World quilt and I gave it to my daughter. My grandmother made this version of a quilt many times, using smaller pieces.
Before my mother got sick, she had hand pieced three quilt tops and gotten them ready to quilt. I've had them stored away for the past 5 years and finished up these two for my brothers (I'm still working on the one I kept for myself).
Mother always signed her work, so I took a picture of one of her signatures and printed it onto labels to add to the back of these quilts.
My son wanted to do something special for his girlfriend and decided to make it himself. Not bad for just some straight stitching to make a fleece blanket. The extra part of this quilt is that the back side has a pocket to tuck your feet in.
Into every quilt a ripper usually comes!
I've got this idea for next Christmas...something my grandmother used to do...and this is the beginning of that idea....something for everyone. That's a long list, about 14 people.
I bought a jelly roll of 42 - 2 1/2 inch strips. I sewed the different color variations together and then cut those in 2 1/2 inch strips. I draw out an idea with black spacers added. It's going to be very colorful!
I never did show you (whoever the "you" are that follow my blog...thank you, BTW for following me!) what I did with the hexagons.
I've posted before about my flower basket quilt that I've been making for well over a year now, so I decided to add some hexagons to that quilt.
I spaced the petals for the flower and used a green one for the leaf. I love how it turned out. The only embroidery I added was a steam and vines for the leaf.
My cat decided to join me in my hexie fun. I was laying out a pattern when he decided to do this.
While all these pieces are from the same fabric line from Moda, Winter's Song, for what I have planned for the rest of the hexagons, I think they are a little too bring. Off to cut some more of the browns, reds and greens.
I make that statement to people asking me to quilt for them. I don't have a professional quilting machine or taken any classes. I'm basically self taught (in the last 5 years, machine quilting) and am still learning every time I sit down to the machine.
This new project has me definitely learning a few things and a professional quilter would probably cringe with what I'm about to show....but it's working for me and I'm not out to try and win any contests.
I was given a vintage quilt top bought at an auction for $35 and asked to quilt so that it could be resold in a local arts & craft store. I normally do free hand motion quilting with loops or stipple design, but the owner of the quilt wanted it quilted "where you only see the quilting on the back". The nearest thing I could figure out he was talking about was to do a "stitch in the ditch" or "outline quilting". That sounds easy enough, but after quilting the first two blocks, I had huge wrinkles on the back.
I also had to work with a quilt top that had wrinkles worked into the blocks (see the brown strips in the picture above). Pulling out the handy ripper and undoing those two blocks, I did some research (on-line) and started over. The first strip of blocks (working from the top across) really wasn't much of a problem, but turning the quilt in the machine to go around each sail was still causing some issues. It's a queen size quilt, so when I turn it at certain points, that means taking all the quilt through the opening in my machine (Janome Memory Craft 6600) and there just wasn't enough room. By using the backstitch option on my machine, I eliminate a lot of the turning. I'll show you what I did, trying to explain it in words and pictures, but I also did a couple of videos (and they won't win me any awards either! I'll apologize in advance for the very, very poor quality).
After finishing the first row, I rolled it and pined it in place (with safety pens).
Now I'm ready to start on the second row of blocks.
Turning the quilt so that the rolled top is in the open area of my machine, I pull up threads to begin quilting at the top of one of the "sails" of the boat pattern..
Then I backstitch to the far corner. In the video I'm doing this with one hand guiding and the result is crooked stitches, but with both hands free and using the brown fabric as a guide the stitches are fairly straight.
WARNING: When you are done with the backstitching, let up off your peddle before letting go of the backstitch button. If you don't, you will sew forward again and possibly get out of line. (I speak from experience here and you can see that in the video as well, although I don't point it out.)
I told you it was a rough video, but I think you get the idea. Here's another video where I talk you though what I'm doing. Still rough, so you might want to take some sea-sick pills.
So here's some still shots of what I went over in the two videos.
Making the turn at the corner (after backstitiching) I now turn the quilt so the block is facing me and sew straight down to the outside edge of the bottom of the boat.
Pivoting at this point (and you can see from the quilt that the creator of the quilt did not get all her points of the half square triangles to work out just right, some of them got sewn into the strips) I sew on the outside seam of the bottom of the boat all the way across.
Pivoting again, I sew from the point of the boat to the bottom of the block.
(allow me to show this next step with a different block)
Stitching straight down to the point of the block, I could either backstitch all the way across or turn the quilt so that the bulk of the quilt is now in the open area of my machine. Either way will work, in the picture below, I turn the quilt instead of backstitching. This is the only time the bulk of the quilt is under my machine.
To get back up to the boat, I turn the quilt (facing me) and backstitch to the inside point of the boat. I will cross over my previous stitching line for a couple of stitches and I try to stay right on top of them so that I don't have double lines.
Now, I'm position to quilt the inside of the boat. doing the same thing again, stitching down, across and back up, remaining inside the boat when I turn. This time I do use the backstitch function and, using the seam as a guide, backstitch across the inside of the top of the boat all the way across. At the other side (sorry, no pictures for this), I follow my stitching line and "get into" the yellow fabric and sew across the top of that same seam all the away across. (still no pictures but outlined in the 2nd video) I match my seams on the side of the block and stitch to the top, backstitch from the corner to the first sail and then stitch down the outside seam of the first set of sails. Now I'm at a point where I can move to the inside of the bottom sail and work the inside of it and continue working all the sails, inside and outside the seams.
When I'm done, I end up back at my starting place with only my beginning and ending threads to tie off and hide.
Here's what the back of the block looks like. I still need to go back and add the quilting on the brown strips, but I'll do that after all the boats are quilted.
I'm sure a professional quilter will say that this is not the way to do this....but....it works for me!
I love this quote. I saw it last night reading Bella Grace Magazine and had to add it to my art journal. I have a feather that I've put as a marker for the page, symbolizing the image of flying.
A turkey feather...how odd.
I found it on the road after a flock of young turkeys were hurrying across the road, scared, excited, trying to just get out of the way and be safe. The fence was one where they couldn't run through it or under it....they had to fly.
Turkey's would rather run and walk than fly and I wonder sometimes if they forget they can fly.
(Turkeys in the back yard)
It only took one of these turkeys to spread its wings before the others followed.
Yesterday, Fall blow in with a light frost and a beautiful day for a festival.
My daughter, Sally, and I set up at the annual Harvest Festival held at the beautiful Grinder's Switch Winery and have a wonderful day of meeting other local artists and lots of neighbors and visitors to our area. In our booth, I believe you could find something for just about everyone on your shopping list and lots of things for yourself. Lots of customers left wearing their new purchases from Sally's collection of handmade silver jewelry. Check out her items at Spring Creek Jewelry.
My repurposed journals were the hit for the day and I'm so glad that I talked with so many young people wanting to do art and write. My canvas art did well also and I got to share about bible art journaling while explaining how I did the art on vintage bible pages.
Sally and I both had our quilted items out and Sally makes the cutest aprons!
Our next show will be before Thanksgiving and you can always contact us through our Etsy shops. Piney's Needle and Spring Creek Jewelry.
Lately, I've noticed a theme going on with where God is leading me in my daily bible reading and other studies.
Come & See
It was in John as Andrew encouraged his brother, Simon to "come & see" this man he had met. Then Jesus said when they asked Him who he was (where he was staying), "come & see". Joshua told the Israelites to "come & listen" to what God had told them to do. And today, Queen Sheba said that she didn't believe how wise and great Solomon was until she "came & saw" for herself.
There are some things that you just have to "come & see" for yourself.
I think Creative Bible Study is one of those things.
When I try to tell people what I'm doing with my bible, they don't really "get it" until they see if for themselves. I'm so excited that the ladies of my church are going to get to "come & see" for themselves during a retreat we are hosting in August.
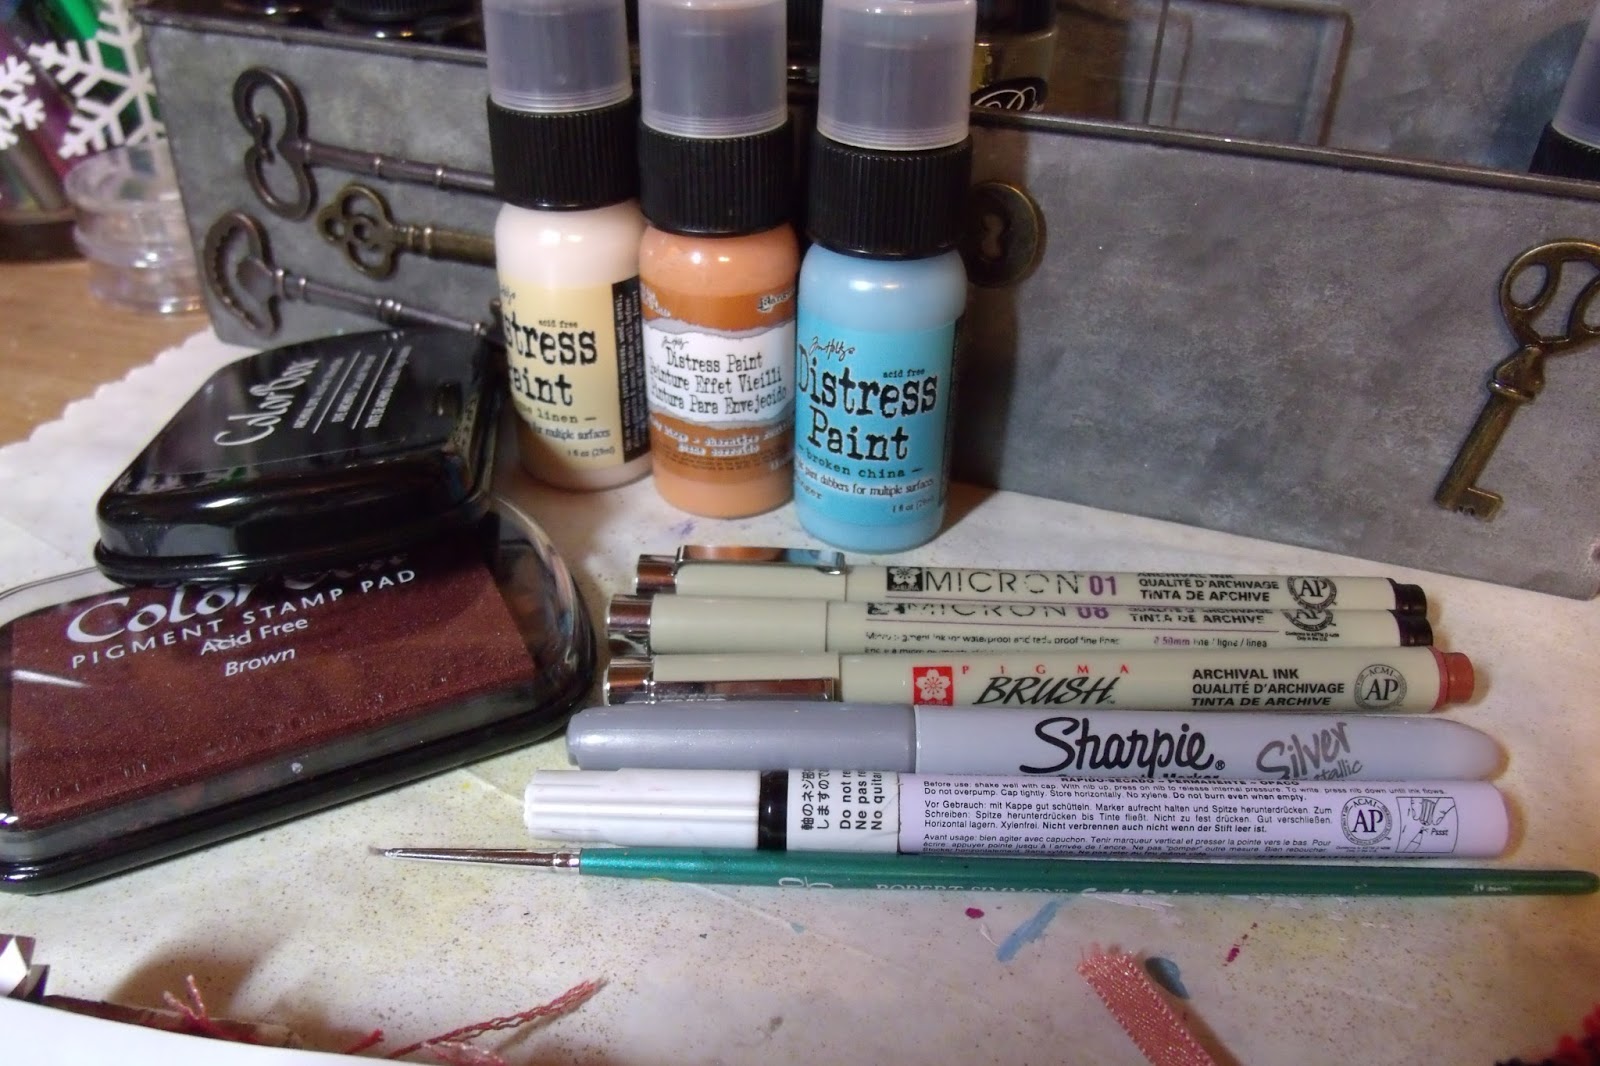
I decided to snap some pictures as I was doing my creative bible study this morning since I was playing with lots of mediums. I was focusing on the reading from 2 Kings 10:7 where Queen Sheba visited Solomon.
I knew I wanted to do something with paints or stamps and since those might have a tendency to bleed through the page, I first prepped the page with a thin layer of Gesso (mine was not clear, but that is on my shopping list). Then I sponged some distressed inks onto the page, starting with the blue, yellow and finally the cream.
I was really pleased with how this turned out, but realized that what I had in mind was going to take more room than just the journaling column. So I added more gesso and the inks again.
I dried with a heating tool between applications. My idea was to draw a pair of old glasses, the round rim kind, and put the words "came & saw" in the lens. I laid out all my stamps and used some tape rolls as the circles for my glasses.
By laying out the stamps first and then pressing the mounting block directly onto them at this point, I have the placement exactly as I want it.
I had to use some of my pens to touch up where the stamping didn't completely ink well. I used the silver sharpie very lightly on the lenses and I did some highlighting with the paint brush and the paint pen.
Here's the final picture of the page. I added some arrows and leaves for extra fillers and color.
God calls each of us to encourage others to "come & see" what He is doing in our lives. I've started a Facebook page related to just Creative Bible Study. Come & See!
We are participating with the annual Art & Ag Tour through my hometown, Hickman County, TN. Check out the blog and guide information HERE. Last year we opened our home up to hundreds of visitors and they ate BBQ and pie in our yard, viewed a quilt display and browsed hand-made items on my porch. You can read about last year's tour HERE.
This year we are set up at our neighbor's place, the brand new Pinewood Store & Kitchen. Oh, the store's not new, it's been a fixture in the Pinewood community for decades, but the inside is brand new with some wonderful things happening. It is literally a "farm to table" restaurant with the Pinewood Farm (across the road) providing all the meats and veggies for a healthy take on your favorites. Lee & Mee McCormick are trying hard to teach us how to make healthy choices. So to bring attention to the soft opening of the kitchen, we are in the back corner of the store. It looks great with all wood and brick used from the Pinewood area, from old buildings and houses. And the food is wonderful!
I really want to spotlight Sally at this tour and while we both have are quilts, and I have my journals and mixed media, on the corner of this table is the newly formed Spring Creek Jewelry.
Sally learned silversmithing and has created some beautiful and unique pieces of art that you can wear! I love this one.
Some of her rings are made with Piney River rocks, collected and polished by my family when I was a kid. She won't have the rings listed in her Etsy shop until after the show, but check out her shop HERE.
Come on out and see us today, 11:00 -6:00, Exit 163 off I-40, HWY 48 South, about 6 miles. From HWY 100, take HWY 48 North about 15 miles (honestly don't know about that one, just come until you see the store!)