Bloglovin'

Tuesday, May 31, 2016
Sunday, April 10, 2016
The Death Star
"Hey, Aunt Deborah, could you make me a pillow case?" (text from my great-niece)
(Inset picture of a moon on a dark background.)
"Can you send me a link to the picture, because that is not just a normal moon?"
 "That's not a moon...that's the Death Star." I text back.
"EXACTLY!!"
"Seriously?"
"Yes, and can you make it a blanket instead?"
So....here I am, trying to make a Death Star blanket. I've read the instructions for making the pillow, but since my DS was going to be so much bigger, I had to do my own pattern. I bought the background fabric a couple of weeks ago and it has a "Milky Way" look to it. However, I kept putting off trying to figure out the pattern...until yesterday.
The hardest part was trying to find something large enough to trace a circle big enough.
I didn't.
I decided the DS would need to be about 30 inches round, so I cut a string 15 inches and tied it to a pencil. Using the only thing I could find large enough for tracing paper, I used the back of wrapping paper. I decided to go with making 2 half circles. I used the straight edge of the paper, holding the string down on the edge and simply held the string tight while I drew a half circle.

 I folded it in half and trimmed it up to get a good shape. Using the pattern for the pillow case as a guide, I marked the bottom section off so that it would have 3 rows. Still using the string, I curved it a little at the center to get the look of a circle. Then I just marked some patchwork pieces on those rows.

 I did the same thing for the top port of the DS, but making 4 rows. I used the strings as a guide when I drew the lines for the rows.
 So, here is the result. I did a smaller circle for that strange part of the Death Star that kind of looks like it's dented.
 I'm going to use a black strip to separate the two pieces, and then do all the star in whites and blacks.
I colored all the pieces that will be black and then numbered them by row (1A, 2A...1B, 2B....) I did a little adjustments to my lines to have a more curved look on the edges.
 All the pieces are cut out and ready to be put with fabric.
Today's project.
You just never know what those crazy kids will ask you to do when you expose them to the culture of Star Wars.

(Inset picture of a moon on a dark background.)
"Can you send me a link to the picture, because that is not just a normal moon?"
"EXACTLY!!"
"Seriously?"
"Yes, and can you make it a blanket instead?"
So....here I am, trying to make a Death Star blanket. I've read the instructions for making the pillow, but since my DS was going to be so much bigger, I had to do my own pattern. I bought the background fabric a couple of weeks ago and it has a "Milky Way" look to it. However, I kept putting off trying to figure out the pattern...until yesterday.
The hardest part was trying to find something large enough to trace a circle big enough.
I didn't.
I decided the DS would need to be about 30 inches round, so I cut a string 15 inches and tied it to a pencil. Using the only thing I could find large enough for tracing paper, I used the back of wrapping paper. I decided to go with making 2 half circles. I used the straight edge of the paper, holding the string down on the edge and simply held the string tight while I drew a half circle.


I colored all the pieces that will be black and then numbered them by row (1A, 2A...1B, 2B....) I did a little adjustments to my lines to have a more curved look on the edges.

Today's project.
You just never know what those crazy kids will ask you to do when you expose them to the culture of Star Wars.

Wednesday, March 16, 2016
Paper Piecing
Moving into a new office, for me, means new decorating. I wanted something that wouldn't clash with my co-workers decorations (since we share an office now) but yet still reflect my personally. Since I work for a publishing company, what better way to showcase my love for books than a bookshelf wall hanging.
I found the pattern a Craftsy for about $5. It is paper pieced and measures 24 x 27 inches. So the "books" get really small! I wasn't expecting them to be so small, so I was glad for the paper piecing technique.
I haven't really done much paper piecing, but I have a huge basket of scraps that is perfect for this type of project. You have a basket like that, right? Little pieces of left over fabric, too small to use in your project but too big to throw away.
The pattern was a PDF file, so I printed out 2 copies, one to keep and the other to be used in the paper piecing process.

 Place the yellow fabric over the printed fabric, right sides together.
 At the sewing machine, sew on the paper pattern at the A2 line.


Carefully trim away the excess fabric, being careful not to cut the paper.
 Iron the yellow fabric up. Add the small piece of printed fabric, right sides together. The picture shows my mistake, because I didn't turn the fabric so that the words wouldn't be upside down when I'm finished. I corrected that in the final process but didn't take a picture.

 Now sew on the second line at A2.
 Trim away the excess fabric, still being careful to not cut the paper.
 Here's what you have. Do the same thing at the bottom of the "book".


 This is the finished book from the back.


 Finished book, ready to be added to the bookshelf.
 To add to the rest of the set, sew along the marked side of the book, which is a 1/4 inch seam allowance.


I found the pattern a Craftsy for about $5. It is paper pieced and measures 24 x 27 inches. So the "books" get really small! I wasn't expecting them to be so small, so I was glad for the paper piecing technique.
I haven't really done much paper piecing, but I have a huge basket of scraps that is perfect for this type of project. You have a basket like that, right? Little pieces of left over fabric, too small to use in your project but too big to throw away.
The pattern was a PDF file, so I printed out 2 copies, one to keep and the other to be used in the paper piecing process.
Here's how one of the "books" was made.
Each block of the wall hanging is made of a 5 inch block, or set of books. Each set is shown in the order of how it should be sewn together. (A1, A2, A3...) I wanted to use some lettering on the fabric to be the "title" of my book, so I aligned the pattern to the wrong side of the fabric and pined it down. The right side of the pattern is showing because this is where you will sew.

This particular book has gold strips in the binding and they are tiny! I trimmed the fabric so that it was just a little larger than the pattern. They yellow will be my gold trim and then two more small pieces of the book fabric for the area at the top and bottom of the book.


Carefully trim away the excess fabric, being careful not to cut the paper.


Trim the excess fabric from around the paper pattern.


I used fabric with words and also embroidered my own titles on some of my books.
I waited until the entire wall hanging was done and then removed most of the paper from the back. I didn't get all the pieces off, but I'm happy with how it turned out. I only quilted in the brown background with a stippling stitch and then a loop design in the border.

Friday, February 12, 2016
Mark My Place
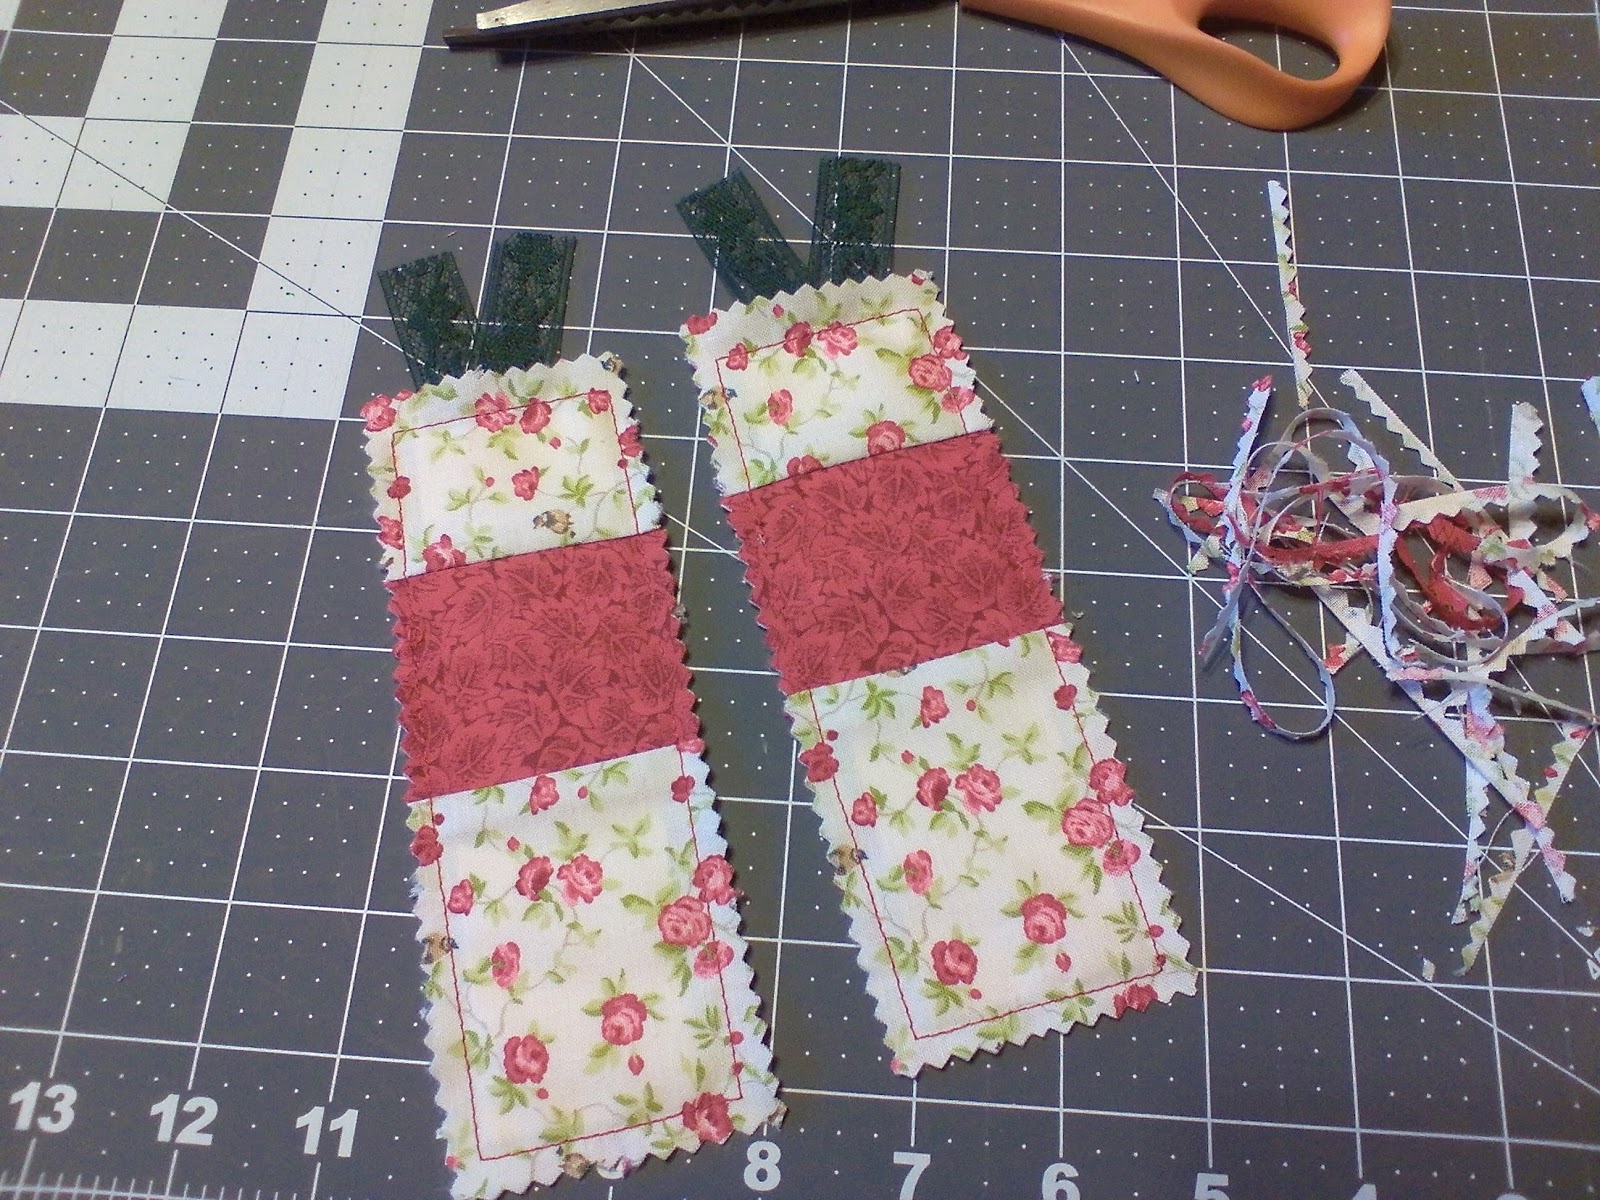
Most of my social media sites are for inspiration and occasionally, I try to recreate some of the inspiration. This happened this week on Instagram with Riley Blake Designs. They showed how to make the cutest bookmark and I thought I would make a few for some of my friends.
As always, I usually do my own version, cutting out a few steps, but the original version can be found HERE.
I followed their instructions up to a point, especially with the supplies, changing their measurements a bit:
Scrap fabric measuring 2 1/2" x 6" per bookmark
Card stock scraps measuring 1" x 5"
Lace trim measuring around 5 inches
Coordinating thread
If using a pieced strip for one side of the bookmark, just trim it up to the measurement requirements after you piece it together.
Here's where I change it up a bit. I do everything in 1 step.
After piecing and getting my pieces cut to the measurements above, I simply layer the pieces with the card stock and ribbon in place.
 Pin through the lace and fabric layers at the top and also at the bottom. I don't pin through the paper, but close to it to hold it secure.
 Staring on one side, I sew at least an 1/4 inch seam all the way around. Once sewn, I trim all the sides with pinking shears, cutting both front and back, except for the fabric at the top. I pull each piece away and trim individually, so as not to cut the ribbon.
 That's it! Honestly, it took about 10 minutes...if that.
 I added some punched hearts and put these in the mail...but I kept one for myself!
As always, I usually do my own version, cutting out a few steps, but the original version can be found HERE.
I followed their instructions up to a point, especially with the supplies, changing their measurements a bit:
If using a pieced strip for one side of the bookmark, just trim it up to the measurement requirements after you piece it together.
Here's where I change it up a bit. I do everything in 1 step.
After piecing and getting my pieces cut to the measurements above, I simply layer the pieces with the card stock and ribbon in place.


Monday, December 28, 2015
And That's a Wrap!
Another Christmas season has been wrapped up and with it several handmade gifts were given and received. A handmade Christmas is traditional in our family. Gifts always seem to carry some family history or significance.
For my kids:
 This quilt was made from a vintage quilt top bought at an estate sale. I think, because of the pink fabric, it was done in the 1930s. The scraps used are from clothing. I gave this to my son, it's about a queen size quilt.
 I made this Christmas quilt using precut Moda squares from the Winter's Song line. It's a small 'Round the World quilt and I gave it to my daughter. My grandmother made this version of a quilt many times, using smaller pieces.

Before my mother got sick, she had hand pieced three quilt tops and gotten them ready to quilt. I've had them stored away for the past 5 years and finished up these two for my brothers (I'm still working on the one I kept for myself).

 Mother always signed her work, so I took a picture of one of her signatures and printed it onto labels to add to the back of these quilts.
 My son wanted to do something special for his girlfriend and decided to make it himself. Not bad for just some straight stitching to make a fleece blanket. The extra part of this quilt is that the back side has a pocket to tuck your feet in.


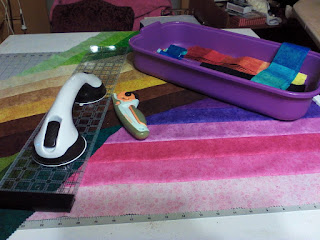
I've got this idea for next Christmas...something my grandmother used to do...and this is the beginning of that idea....something for everyone. That's a long list, about 14 people.
I bought a jelly roll of 42 - 2 1/2 inch strips. I sewed the different color variations together and then cut those in 2 1/2 inch strips. I draw out an idea with black spacers added. It's going to be very colorful!


So that's it for 2015...time to start 2016.
For my kids:


Before my mother got sick, she had hand pieced three quilt tops and gotten them ready to quilt. I've had them stored away for the past 5 years and finished up these two for my brothers (I'm still working on the one I kept for myself).


Into every quilt a ripper usually comes!


I've got this idea for next Christmas...something my grandmother used to do...and this is the beginning of that idea....something for everyone. That's a long list, about 14 people.
I bought a jelly roll of 42 - 2 1/2 inch strips. I sewed the different color variations together and then cut those in 2 1/2 inch strips. I draw out an idea with black spacers added. It's going to be very colorful!


So that's it for 2015...time to start 2016.
Wednesday, December 2, 2015
Hexagon Flower
I never did show you (whoever the "you" are that follow my blog...thank you, BTW for following me!) what I did with the hexagons.
I've posted before about my flower basket quilt that I've been making for well over a year now, so I decided to add some hexagons to that quilt.
 I spaced the petals for the flower and used a green one for the leaf. I love how it turned out. The only embroidery I added was a steam and vines for the leaf.
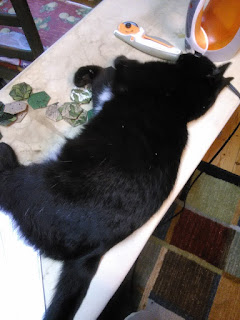 My cat decided to join me in my hexie fun. I was laying out a pattern when he decided to do this.


I've posted before about my flower basket quilt that I've been making for well over a year now, so I decided to add some hexagons to that quilt.


While all these pieces are from the same fabric line from Moda, Winter's Song, for what I have planned for the rest of the hexagons, I think they are a little too bring. Off to cut some more of the browns, reds and greens.
Subscribe to:
Posts (Atom)