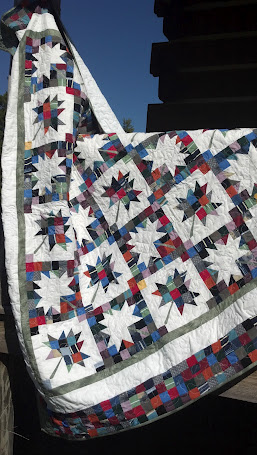
About 2 years ago I started a conversation with someone about a memory quilt, made from saved t-shirts. I started working up quotes and ideas. I had made quilts from my children's clothes before...or really material left over from clothes I made them. I have quilts made from the material from clothes that my mother made for me and one that her mother made from her clothes....but for the most part, what everyone was asking me was for the t-shirt quilts.
I'm not a huge fan of those...maybe because my kids always wore out their t-shirts and we swapped clothes with so many other kids that their t-shirts held other people's memories too. But I want to quilt for other people, so to get orders...I had to be prepared.
I started putting out the word and doing some quotes.
Then, a friend contacted me after her husband had died. She asked if I could make a quilt using his shirts, not a t-shirt quilt, but one made with a variety of fabrics, into a different pattern. We got together, talked about her husband a bit and selected a pattern. I got the pattern here. You can read about the journey of Chris' Quilt here.
I seemed to take forever...mainly because I didn't do a very good job of managing my time....and honestly...as I shared with Leah....the journey of making Chris' quilt was a bit daunting because of the grief journey of my own that I was traveling. Chris' quilt was healing for me and I'll be forever thankful to Leah for allowing me to take this journey with her.
But last week, I finished the quilt and shipped it off to Leah. As I was quilting it, I "wrote" words that Leah had requested into the quilting. And I prayed. As I quilted over and over, I felt God leading me to put other words into the quilt...words for Leah from Him. I truly felt guided. It was an amazing experience.
I had such a strong sense that God was leading me more than just to "write" words into Leah's quilt...He wanted me to do it for others. Within minutes of posting a picture of the quote on Facebook, I was asked to do just that. I'm praying that this is something that God continues to ask me to do.
You see, while working on the quilts, I think about the person behind the clothes, how they impacted the lives around them and how those left need to be comforted and that becomes the main prayer behind the quilt...how to offer comfort.
So I'm opening myself up to being used by God to wrap people in comfort. If you are interested in a memory quilt, please contact me at boutwell_d@bellsouth.net for details.
I also am working on quilts made from baby clothes and working them into a new pattern, so the memory quilts aren't just to remember those that have passed away, but also the passage of time.
Here's some final pictures of Chris' Quilt, the quilting process.
Pinning, preparing the layers.
How I set it up to quilt it.
Started using some 60 weight thread for the bobbin and didn't have to change bobbins as often...loved this!
Also, to put the binding on, I wrapped the binding up and put it on one of the thread holders and then feed it into the machine.
Here's the main theme of the quilt....God is love and He wants to wrap Leah up in that love.
The flower was the last inspired words. This was the last corner to finish up and God had me remember that Chris had always sent Leah flowers, so it just seemed to fit.
In each of the white leaves, I "wrote" words that Leah had used to describe her husband, dates of importance, and names of those important to Chris...Jesus being one of those.
I did make a mistake...well many...I never claimed to be an expert quilter! But one of the leaves got turned wrong, but it's not real noticeable.
I love the boarder. I changed it up from the pattern, but I love it.
Showing posts with label Chris Memory Quilt. Show all posts
Sunday, September 30, 2012
Sunday, February 12, 2012
Dear Leah, Chris' Quilt
Dear Leah,
I wanted to give you an update on Chris' Quilt. I also wanted to remind you that I had told (warned may be the better word) you that I had never done a commissioned piece before or worked with so much jersey material.....I say that in hopes that you will understand that when you read about this journey Chris' shirts and I are on, you see it truly as a journey...not to be rushed. Thank you for not giving me a time frame.
This journey of redesigning all of Chris' shirts into a new design, with a new purpose, has been a bit more complicated than I had first anticipated. I'm sure you could have found someone else that could have already had this quilt finished for you, but I am so thankful you asked me to. I never take for granted that each little 2 inch square that I am holding is a memory for you.
This weekend, I finally got all the shirts cut into 2 or 3 inch strips. I began the process of sewing 2 strips of the 2 inch strips together and then cutting that combination into 2 inch segments. With these segments, I can build the blocks of the quilt. With the 3 inch blocks, I made the white/colored squares you see below. They will make the points of the leaf. This step takes a little longer since the technique for making these half square triangles (as they are called) requires starting with 2, 3 inch squares, marking them, sewing, cutting, ironing, and then squaring them up to 2 inches. Each square makes 2 HST.
The first set of leaf blocks will have the colored fabrics making up the body of the leaf. This is what the finished block will look like. I have to make 15 of these. Then I'll have to make 15 blocks where the colored fabrics make up the back ground of the block and the body of the leaf will be white.
I have everything set up now to do more of an assembly line process while making the blocks. I have the centers of all the first 15 blocks made. I'm working on all the points of the leaf to add around what I have already made. My plans are to have these 15 blocks done by this weekend, when I'll then start on the other 15 blocks.
I'll be honest...at first it wasn't easy to sew on the jersey material. I switched needles and worked out my technique to make the materials slid through my machine without jamming it...which it had done a few times before, causing me to have to literally take my machine apart. I can do a block fairly quickly now, that I have all the parts of the block done.
As I said, I never take for granted how special my task is,. Every piece matters, it can't be replaced. I'm being extra careful not to make a mistake. We picked this pattern knowing how much Chris loved the outdoors. I thought you might like the fact that the name of the fabric I'm using for the white background is called "Snow".
I'll continue to keep you updated with our journey.
Deborah
I wanted to give you an update on Chris' Quilt. I also wanted to remind you that I had told (warned may be the better word) you that I had never done a commissioned piece before or worked with so much jersey material.....I say that in hopes that you will understand that when you read about this journey Chris' shirts and I are on, you see it truly as a journey...not to be rushed. Thank you for not giving me a time frame.
This journey of redesigning all of Chris' shirts into a new design, with a new purpose, has been a bit more complicated than I had first anticipated. I'm sure you could have found someone else that could have already had this quilt finished for you, but I am so thankful you asked me to. I never take for granted that each little 2 inch square that I am holding is a memory for you.
This weekend, I finally got all the shirts cut into 2 or 3 inch strips. I began the process of sewing 2 strips of the 2 inch strips together and then cutting that combination into 2 inch segments. With these segments, I can build the blocks of the quilt. With the 3 inch blocks, I made the white/colored squares you see below. They will make the points of the leaf. This step takes a little longer since the technique for making these half square triangles (as they are called) requires starting with 2, 3 inch squares, marking them, sewing, cutting, ironing, and then squaring them up to 2 inches. Each square makes 2 HST.
The first set of leaf blocks will have the colored fabrics making up the body of the leaf. This is what the finished block will look like. I have to make 15 of these. Then I'll have to make 15 blocks where the colored fabrics make up the back ground of the block and the body of the leaf will be white.
I have everything set up now to do more of an assembly line process while making the blocks. I have the centers of all the first 15 blocks made. I'm working on all the points of the leaf to add around what I have already made. My plans are to have these 15 blocks done by this weekend, when I'll then start on the other 15 blocks.
I'll be honest...at first it wasn't easy to sew on the jersey material. I switched needles and worked out my technique to make the materials slid through my machine without jamming it...which it had done a few times before, causing me to have to literally take my machine apart. I can do a block fairly quickly now, that I have all the parts of the block done.
As I said, I never take for granted how special my task is,. Every piece matters, it can't be replaced. I'm being extra careful not to make a mistake. We picked this pattern knowing how much Chris loved the outdoors. I thought you might like the fact that the name of the fabric I'm using for the white background is called "Snow".
I'll continue to keep you updated with our journey.
Deborah
Thursday, January 19, 2012
Memory Quilt
Several people have asked me to do a memory quilt for them, using t-shirts and clothes from their loved ones. I've given quotes and ideas and finally someone took the next step and brought me their clothes.
I can't say that I have never made a memory quilt before. I have saved left over material from clothes that I made my children and made both of them a couple of memory quilts. However, this is the first one that I have made from the actual clothes.
I met Leah through work. In the midst of all our work related conversations and emails, we found out that we had some common interests. Leah changed jobs and we stayed connected on-line. It was through that Facebook connection that I found out that her husband had died tragically.
My heart broke. It was just a couple of months after I had lost my mother and my grandmother, so I knew, somewhat, her sorrow.....yet her's was far greater. At least I had time to say my good-byes. But Leah can tell her story so much better. Click HERE to visit her blog and be prepared to cry, laugh, and be inspired.
Anyway....Leah and I had already been discussing a quilt before all the deaths came into our lives. This past fall she asked if I would take her husband's shirts and make a quilt. She actually drove over from North Caroline to bring me her treasures. We had such a wonderful weekend getting to know each other, face-to-face, and going over patterns. I had pulled some ideas together and the very last idea was the one I knew she was going to pick....it just seemed like Chris. It captured his love for the outdoors. I found the free pattern at Cindy Carter's website, The Scrappy Maple Leaf.
I had told Leah it would be after Christmas before I would get started and she was fine with that. I pulled out the shirts and did the simple stuff first, removing all the buttons. I meant to get them to her for a Christmas tree ornament project....but I was a little late getting started so maybe she can do it next year.
I pulled out each shirt, trying to decide how to cut them and my scissors were ready to go to work....but I hesitated. I keep thinking of this wonderful man and where he might have worn each shirt, to church, family nights with his wife and daughter, ballgames, fishing, hunting. Finally, I said a prayer for his wife and daughter and went to cutting.
The pattern calls for lots and lots of 2 inch squares. I'm a little concerned how the jersey type material will work with the cottons and blends. Going over the pattern, I decided to change it up a bit. Instead of cutting all the material in 2 inch squares (like I did below for the first shirt), I cut the material into 2 inch strips.
Yep...that's 2 inch unfinished squares, so we are looking at 1 1/2 inch finished squares with a finished block being 10 1/2 inch.
I'm going to sew the strips together in different combinations and then cut them into 2 inch strips again, of 2 or 3 colors together. Below is a picture of the beginning of the cutting. You can see that there is very little left from the shirts, just the seams, hems, and collars.
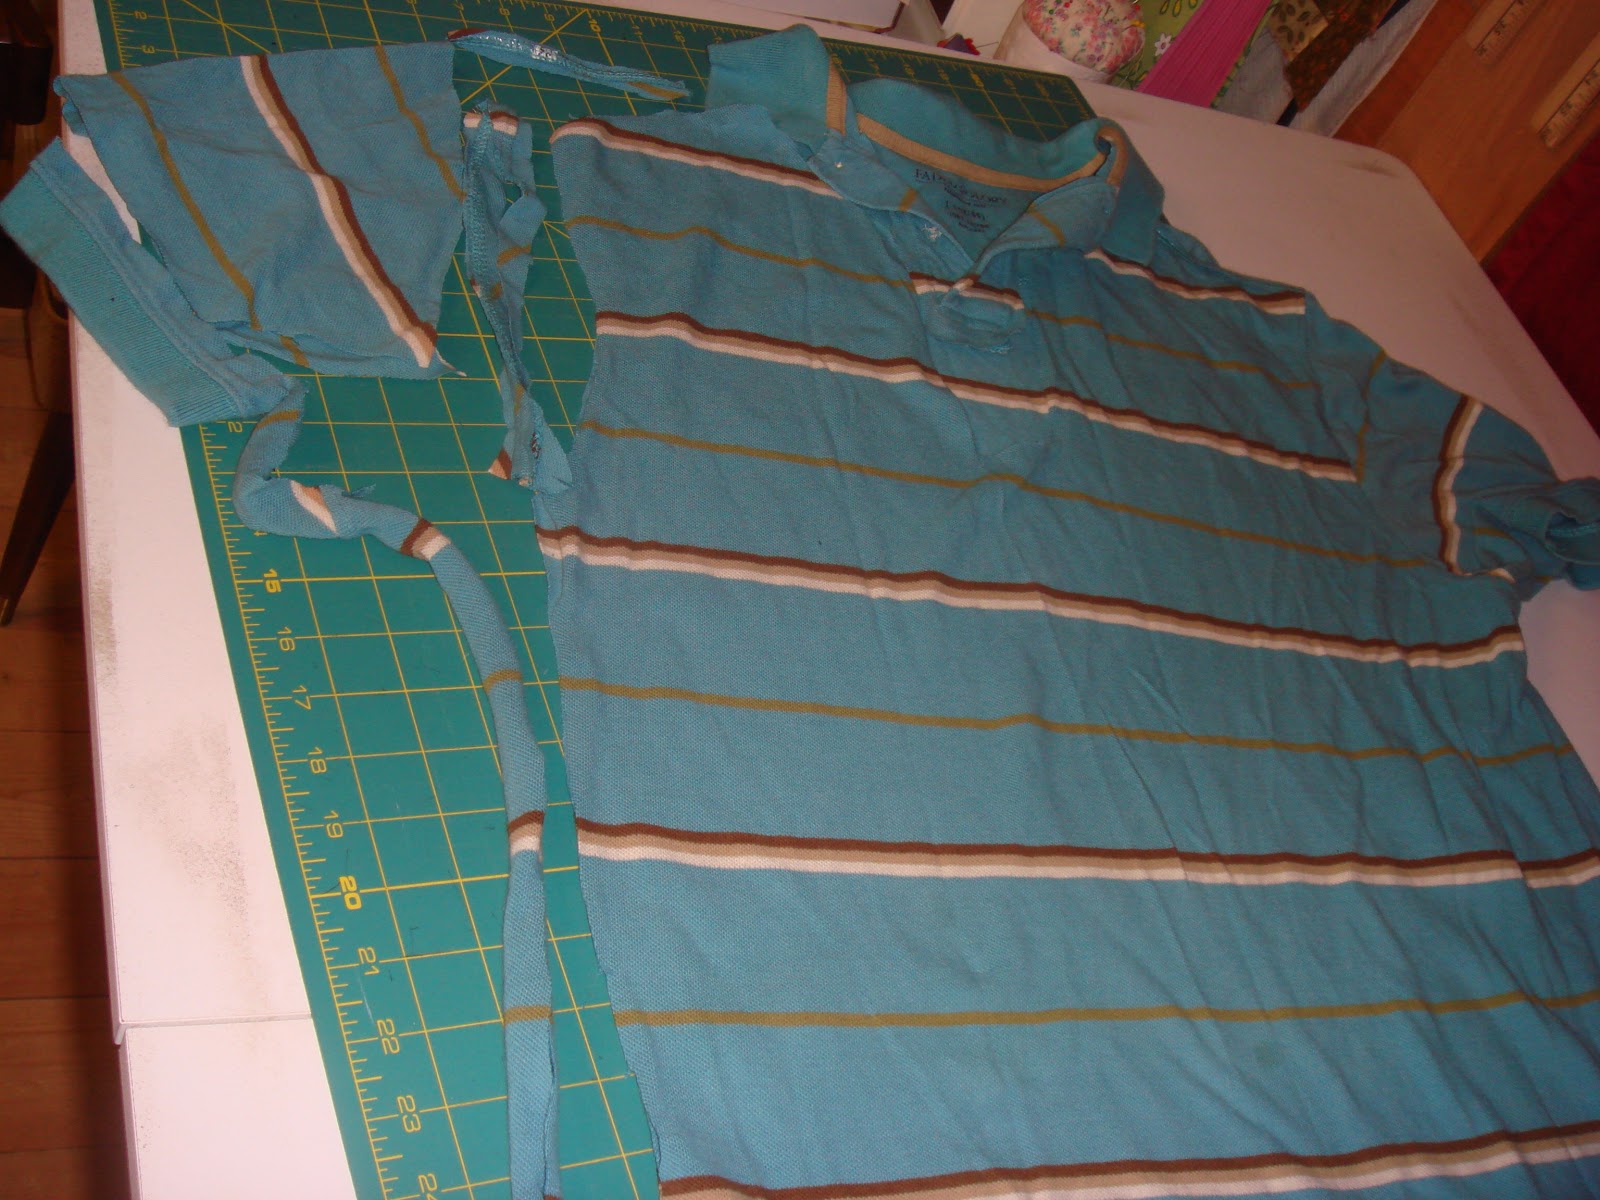
To cut each shirt, I lay it out as smooth as possible and through the seams on the sides up through the arm, removing any hem or binding on the sleeve. Then I cut around the sleeve and to the collar, around the collar and to the other side.
Now I have the shirt in its basic form again, just as if I had removed a pattern piece from it. I lay the front pieces together, square up the ends and start cutting again.
I need 3 inch strips to make the half square triangles, so I cut a few strips off the largest portions of the materials and then cut the rest in 2 inch strips.
I use every 2 inch piece I can, including any pieces from the collar, cuffs, or button hole trim that is big enough. Keeping the cottons and blends straight is fairly easy, however, the jersey pulls a little, but I think it will work out okay. I know most quilters would suggest using some time of stabilizer.....did I mention these are 2 inch individual squares!? I'm going to try and always put a cotton next to a jersey. Here's a few squares for the basic layout.
I'm using a "snow" for the background, cutting them in 3 inch strips and then 3 inch squares. It's a little bigger than really needed for making the HST, but I wasn't sure how the jersey would pull, so I went bigger.
Here's some of the 3 inch squares from the material to be matched up with the "snow" blocks.
I wanted to at least get a sample of one block made last night, so I did the basic technique for making HST, using my ruler to mark 1/4 inch on both sides from the center of the 3 inch square.
I did some chain piecing (sorry, I didn't realize the picture was sideways), sewing on both drawn lines.
Cut down the center.
Press to the dark side.
Trim to a 2 inch square.
This is not a finished block because I'll be working really hard not to use the same material in each block, but it is the basic layout of the maple leaf. I love the little green stem (again using some sample material for the steam and background material).
I think it will look nice with all the colors making the leaves and I pray that it brings some comfort to Leah when she sees it.
Subscribe to:
Posts (Atom)